
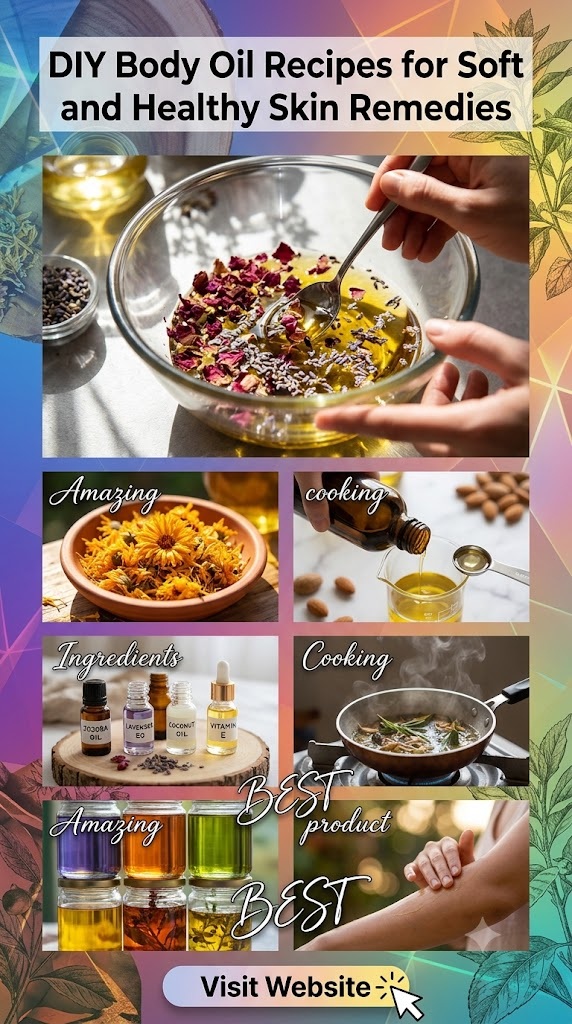
DIY Body Oil Recipes for Soft and Healthy Skin
The Ultimate Guide to DIY Body Oils: Crafting the Path to Radiant, Healthy Skin
Creating your own body oil is not merely a craft; it is an act of self-care and an exploration of botanical science. By understanding the fatty acid profiles of carrier oils and the therapeutic properties of essential oils, you can tailor a formula that addresses your specific skin concerns—be it chronic dryness, loss of elasticity, or seasonal dullness.
Part 1: The Anatomy of a Perfect Body Oil
Before we dive into the recipes, we must understand the three pillars of a high-quality body oil: the Carrier Oil, the Essential Oil (or Botanical Extract), and the Antioxidant Stabilizer.
1. The Carrier Oils: Your Foundation
Carrier oils are the “base” of your blend. They make up about 95-99% of your recipe. These oils are cold-pressed from nuts, seeds, or fruits and carry the essential oils safely into the skin.
- Jojoba Oil: Technically a liquid wax, jojoba is the closest match to human sebum. It is non-comedogenic and ideal for balancing oil production.
- Sweet Almond Oil: A classic choice rich in Vitamin E and K. It has a medium consistency and provides excellent “slip” for massage.
- Fractionated Coconut Oil (MCT): Unlike raw coconut oil, this remains liquid at room temperature. It is incredibly light, odorless, and absorbs almost instantly.
- Argan Oil: Known as “liquid gold,” it is packed with omega fatty acids and saponins, which soften the skin and reduce the appearance of fine lines.
- Rosehip Seed Oil: A “dry” oil that absorbs quickly. It is high in Vitamin A (natural retinol), making it the gold standard for evening out skin tone and fading scars.
- Grapeseed Oil: Very light and high in linoleic acid. It’s perfect for oily or acne-prone skin on the body.
- Avocado Oil: A heavy, deeply penetrating oil rich in oleic acid and chlorophyll. Best for extremely dry, cracked, or mature skin.
2. Essential Oils: The Therapeutic Soul
Essential oils provide the scent and the specific medicinal benefits. Because they are highly concentrated, they must always be diluted.
- Lavender: Calming, anti-inflammatory, and regenerative.
- Frankincense: Known for its skin-tightening properties and ability to reduce the appearance of sunspots.
- Geranium: A natural balancer for both oily and dry skin, with a beautiful floral scent that mimics rose.
- Cedarwood: Grounding and antiseptic; excellent for soothing irritated skin or eczema.
- Neroli: Derived from orange blossoms, it is incredible for improving skin elasticity and reducing stretch marks.
3. Antioxidants: The Preservatives
Since DIY oils do not contain water, they don’t need traditional preservatives. However, oils can go rancid (oxidize). Adding Vitamin E Oil (Tocopherol) acts as an antioxidant that prevents the carrier oils from spoiling while providing skin-healing benefits.
Part 2: The Science of Absorption and the “Wet Skin” Method
To get the most out of your DIY body oil, you must understand how the skin interacts with lipids. The skin’s outermost layer, the stratum corneum, acts as a barrier. When you apply oil to bone-dry skin, it often sits on top, feeling greasy.
The Golden Rule: Always apply body oil to damp skin immediately after a shower or bath.
When your skin is wet, the oil traps the water molecules against your skin, pulling them into the lipid barrier. This creates a makeshift emulsion that hydrates (adds water) and moisturizes (adds oil) simultaneously. This method ensures your skin feels velvety rather than oily and allows you to use less product for better results.
Part 3: Essential Safety and Dilution Ratios
Safety is paramount when working with concentrated botanicals.
- General Body Dilution (2%): For daily use on large areas of the body, use 10-12 drops of essential oil per 1 ounce (30ml) of carrier oil.
- Sensitive Skin Dilution (1%): Use 5-6 drops per 1 ounce of carrier oil.
- Photosensitivity Warning: Citrus oils like Lemon, Bergamot, and Lime can cause severe sunburn if applied before sun exposure. Use “FCF” (Furanocoumarin-free) versions or reserve these blends for nighttime use.
- Patch Test: Always test a new blend on a small patch of skin (the inner elbow) and wait 24 hours to ensure no reaction occurs.
Part 4: Comprehensive DIY Recipes for Every Skin Goal
1. The “Everyday Radiance” Blend
Best for: Normal skin, daily maintenance, and a healthy glow.
This blend uses Sweet Almond oil for its Vitamin E content and Jojoba for its skin-mimicking properties.
Ingredients:
- 2 oz Sweet Almond Oil
- 2 oz Jojoba Oil
- 15 drops Lavender Essential Oil
- 10 drops Geranium Essential Oil
- 5 drops Frankincense Essential Oil
- 1/2 tsp Vitamin E Oil
Instructions: Combine all ingredients in an amber glass bottle. Shake gently before each use. Apply to damp skin after your morning shower for a soft, floral scent that lingers throughout the day.
2. The “Deep Desert” Ultra-Hydrator
Best for: Extremely dry, flaky skin, or winter protection.
This is a “heavy” oil designed to rescue skin that feels tight and parched.
Ingredients:
- 2 oz Avocado Oil
- 1 oz Apricot Kernel Oil
- 1 oz Shea Nut Oil (liquid form)
- 10 drops Sandalwood Essential Oil
- 10 drops Patchouli Essential Oil
- 10 drops Roman Chamomile Essential Oil
- 1 tsp Vitamin E Oil
Instructions: Avocado oil is rich and thick; the Apricot oil helps thin it out for better spreadability. This blend is best used at night so it can sink in while you sleep.
3. The “Silk & Satin” Dry Body Oil
Best for: People who hate the feeling of oil; those who want to get dressed immediately.
Dry oils use high-linoleic acids that vanish into the skin almost instantly.
Ingredients:
- 2 oz Grapeseed Oil
- 1 oz Rosehip Seed Oil
- 1 oz Squalane (derived from olives)
- 15 drops Bergamot (FCF) Essential Oil
- 10 drops Lemongrass Essential Oil
- 1/2 tsp Vitamin E Oil
Instructions: Mix in a spray bottle for easy application. The squalane and rosehip act as “fast-track” carriers, leaving the skin matte but moisturized.
4. The “Ageless Goddess” Firming Oil
Best for: Mature skin, loss of elasticity, and sun damage.
This recipe focuses on oils high in antioxidants and “cellular communicators” like Pomegranate and Frankincense.
Ingredients:
- 2 oz Argan Oil
- 1 oz Pomegranate Seed Oil
- 1 oz Rosehip Oil
- 12 drops Frankincense Essential Oil
- 8 drops Neroli Essential Oil
- 5 drops Helichrysum Essential Oil (the “Everlasting” flower)
- 1 tsp Vitamin E Oil
Instructions: Pomegranate seed oil is very potent and slightly viscous; it contains punicic acid which helps with skin repair. Use this on the décolletage, arms, and legs to maintain a youthful texture.
5. The “Midnight Slumber” Soothing Oil
Best for: Evening rituals, stress relief, and sensitive skin.
This oil is designed to calm the nervous system while soothing skin irritation.
Ingredients:
- 3 oz Fractionated Coconut Oil
- 1 oz Calendula-Infused Oil (see Part 5 for infusion guide)
- 20 drops Lavender Essential Oil
- 10 drops Cedarwood Essential Oil
- 5 drops Valerian or Vetiver Essential Oil (optional for deep grounding)
Instructions: The Calendula helps heal micro-tears in the skin, while the scent profile signals the brain that it is time to wind down.
6. The “Gym Rat” Muscle Recovery Oil
Best for: Post-workout, sore muscles, and invigorating the senses.
This blend focuses on circulation and the cooling/warming sensations of botanicals.
Ingredients:
- 4 oz Sweet Almond Oil
- 15 drops Peppermint Essential Oil (cooling)
- 10 drops Rosemary Essential Oil (circulation)
- 10 drops Eucalyptus Essential Oil (anti-inflammatory)
- 5 drops Black Pepper Essential Oil (warming)
Instructions: Massage vigorously into sore calves, thighs, and shoulders after a warm bath. Avoid sensitive areas and eyes due to the peppermint.
7. The “Tropical Vacation” Shimmer Oil
Best for: Summer nights, parties, and highlighting the collarbones.
This oil adds a subtle bronze glow while nourishing the skin.
Ingredients:
- 4 oz Fractionated Coconut Oil
- 1 tsp Gold or Bronze Cosmetic-Grade Mica Powder
- 10 drops Jasmine Essential Oil
- 10 drops Vanilla Absolute or Oleoresin
- 5 drops Ylang Ylang Essential Oil
Instructions: Add the mica powder last. You will need to shake this bottle vigorously before every use as the mica will settle at the bottom. It provides a “filtered” look to the skin.
Part 5: Advanced Techniques—The Art of Maceration (Herbal Infusion)
To truly elevate your DIY body oils, you can move beyond simply mixing liquids. Maceration is the process of infusing whole herbs into your carrier oils to extract their fat-soluble vitamins, minerals, and scents.
How to Make a Solar Infused Oil
- Choose Your Herb: Dried Calendula (healing), Dried Rose Buds (toning), Dried Chamomile (soothing), or Dried Arnica (bruising/pain). Note: Always use dried herbs; moisture in fresh herbs causes mold.
- Fill the Jar: Fill a clean, dry glass jar halfway with the dried herbs.
- Cover with Oil: Pour your chosen carrier oil (like Olive or Sunflower) over the herbs until the jar is full.
- The Wait: Seal the jar and place it in a sunny windowsill for 4–6 weeks. Shake it daily.
- Strain: Use cheesecloth or a fine-mesh strainer to remove the herbs. What remains is a potent, medicated oil you can use as a base for your recipes.
The “Quick Heat” Method
If you don’t have six weeks, you can use a double boiler. Place the herbs and oil in a glass bowl over a pot of simmering water. Keep the heat very low (do not let the oil smoke or boil) for 3–5 hours. Strain and use immediately.
Part 6: Selecting the Right Packaging
The container you choose is as important as the ingredients inside.
- Amber or Cobalt Glass: Essential oils are light-sensitive. UV rays can break down the chemical structure of the oils, making them less effective or even irritating. Dark glass protects them.
- Pump vs. Pour: For body oils, a treatment pump is often better than a pour-cap, as it prevents air from entering the bottle every time you use it, thus slowing down oxidation.
- Storage: Keep your oils in a cool, dark place. The bathroom is often too humid and warm; a bedroom dresser or a dedicated skincare fridge is ideal.
Part 7: Troubleshooting Your DIY Oils
Problem: My oil smells “off” or like old crayons.
- Solution: Your oil has oxidized (gone rancid). This happens if the carrier oils are old or if they weren’t stored properly. Discard it immediately, as rancid oil creates free radicals that damage the skin. Always check the expiration dates of your carrier oils before mixing.
Problem: The oil is taking too long to absorb.
- Solution: You may be using too much, or your base is too heavy. Try swapping 50% of your carrier oil for a “dry” oil like Grapeseed or Rosehip. Also, ensure you are applying it to wet skin.
Problem: I’m breaking out on my back or chest.
- Solution: You might be using a comedogenic oil. Avoid Coconut Oil (the raw, solid kind) or Wheat Germ Oil on acne-prone areas. Switch to Jojoba or Grapeseed oil, which are less likely to clog pores.
Problem: The essential oil scent is too strong.
- Solution: Dilute the mixture further by adding more carrier oil. Never apply undiluted essential oils directly to the skin.
Part 8: Seasonal Customization
Our skin’s needs change with the rhythm of the Earth. A body oil that works in the humid summer may not suffice in the biting wind of winter.
Spring: The Awakening
Focus on detoxification and brightening.
- Base: Apricot Kernel Oil (light).
- Essential Oils: Grapefruit, Juniper Berry, and Fennel to help with lymphatic drainage and “de-puffing” after winter stagnation.
Summer: The Protector
Focus on soothing sun exposure and lightweight hydration.
- Base: Fractionated Coconut Oil and Aloe Vera Oil.
- Essential Oils: Lavender and Peppermint (cools the skin temperature) or a tiny bit of Carrot Seed oil for its high antioxidant load.
Autumn: The Grounding
Focus on repairing summer sun damage and preparing for the cold.
- Base: Rosehip and Sweet Almond Oil.
- Essential Oils: Patchouli, Orange, and Cinnamon Leaf (use cinnamon very sparingly—1 drop per 2 oz—as it is a “hot” oil).
Winter: The Barrier
Focus on occlusion and preventing moisture loss.
- Base: Avocado Oil, Macadamia Nut Oil, and Castor Oil (adds a thick, protective layer).
- Essential Oils: Myrrh and Cedarwood to heal cracked skin.
Part 9: The Role of Fatty Acids in Skin Health
To become a true expert in DIY body oils, one must look at the fatty acid profile of the ingredients.
- Oleic Acid (Omega-9): Found in high concentrations in Olive, Avocado, and Sea Buckthorn oils. These are rich, heavy, and penetrate deeply. They are best for dry or mature skin.
- Linoleic Acid (Omega-6): Found in Grapeseed, Evening Primrose, and Safflower oils. These are lighter and sit closer to the surface. People with acne-prone skin often have a deficiency of linoleic acid in their sebum, so applying these oils can actually help clear skin.
- Gamma-Linolenic Acid (GLA): Found in Borage and Evening Primrose oil. This is a powerful anti-inflammatory that helps with conditions like eczema and psoriasis.
By blending a high-oleic oil with a high-linoleic oil, you create a “balanced” oil that provides both deep nourishment and surface-level protection.
Part 10: Enhancing the Ritual—Application Techniques
How you apply your oil can transform a chore into a spa-like experience.
- The Warmth Factor: Before applying, rub the oil between your palms for 5–10 seconds. The friction warms the oil, allowing it to penetrate the skin more effectively and releasing the aromatic compounds of the essential oils.
- Upward Strokes: Always massage the oil toward the heart. This aids in lymphatic drainage and stimulates blood flow.
- The “Gua Sha” Connection: Use a large stone Gua Sha tool on your legs and arms after applying oil. This helps break up fascia, reduces the appearance of cellulite, and ensures the oil is worked deep into the tissue.
- Inhalation: After applying the oil to your body, cup your hands over your nose and take three deep, slow breaths. This allows the essential oils to enter the olfactory system, providing immediate psychological benefits like stress reduction or increased focus.
Part 11: Ethically Sourcing Your Ingredients
As you embark on your DIY journey, consider the footprint of your ingredients.
- Cold-Pressed/Unrefined: These terms ensure the oil was extracted without high heat or harsh chemicals (like hexane), preserving the nutrient profile.
- Organic: Since you are applying these oils to your largest organ, organic ensures you aren’t absorbing pesticide residues.
- Fair Trade: Oils like Argan and Shea are often produced in specific regions (Morocco and West Africa). Buying Fair Trade ensures the women who harvest these ingredients are paid a living wage.
- Sustainable Sandalwood: Sandalwood is often over-harvested. Look for Australian Sandalwood or sustainably farmed Indian Sandalwood to protect the ecosystem.
Part 12: Creating a Signature Scent Profile
The “dry down” of a body oil is like a perfume. You want it to have layers.
- Top Notes (The first impression): Citrus oils, Peppermint, Eucalyptus. These disappear quickly.
- Middle Notes (The heart): Lavender, Geranium, Chamomile, Ylang Ylang. These last for a few hours.
- Base Notes (The lingering soul): Frankincense, Patchouli, Sandalwood, Vanilla, Myrrh. These can last all day.
When building your recipe, try to include at least one oil from each category to create a complex, sophisticated aroma.
Part 13: Frequently Asked Questions
Can I use these oils on my face? While some of these oils (like Jojoba, Rosehip, and Argan) are excellent for the face, body oils are generally formulated with a higher concentration of essential oils than is recommended for facial skin, which is thinner and more sensitive. For the face, keep essential oil dilution at 0.5% to 1%.
How long do DIY oils last? Most DIY body oils will last 6 to 12 months, depending on the stability of the carrier oils used. Adding Vitamin E always extends this life. If the oil starts to smell like “heavy oil” or loses its floral scent, it’s time to make a new batch.
Can I use coconut oil from the grocery store? You can, but unrefined (virgin) coconut oil is solid at room temperature. This makes it difficult to use in a pump bottle and can feel “greasy” on the skin. Fractionated coconut oil is preferred for a professional-feeling body oil.
Is body oil better than lotion? They serve different purposes. Lotion introduces water to the skin, while oil seals it in. For the best skin health, many dermatologists recommend applying a thin layer of lotion followed by a layer of body oil to “lock” everything in.
Conclusion: The Radiance of Self-Sufficiency
The journey into DIY body oils is more than just a beauty hack; it is an education in botany and a commitment to pure ingredients. When you blend your own oils, you strip away the marketing fluff and the plastic-filled fillers. You are left with the potent, vibrating energy of plants—oils that have been used for thousands of years by queens and healers alike.
Whether you are seeking the grounding scent of a forest floor or the bright, zesty aroma of a summer citrus grove, your perfect skin is only a few drops away. By mastering the balance of carriers, the science of essential oils, and the ritual of application, you unlock a level of softness and health that truly radiates from the inside out. Experiment, breathe deep, and enjoy the glow.